Tuesday, February 7, 2012

The Deadman Lives - Part 11

I thought I'd get a lot more done this week, but NOOOO!!! I've had an issue with the master bath shower door installation.  I'm up to four corrected shipments, once the part arrives tomorrow.  Luckily, it wasn't my error.  After I'm done with this bench, finishing the master bath "semi" remodel will be my priority.  I get to make several lamps for that project and I'll, of course, take you  along.

This week I got the bench assembled and applied two coats of polymerized tung oil.  These photos are with the oil still wet.


This particular oil is my favorite finish, as it's super easy to apply and looks wonderful.  I've used straight tung oil and a tung oil varnish before, but this applies and dries differently.  It also provides the ability to build a finish, if you wish.  I like it for the bench because I can reapply without any prep work and because this is a work bench, the surface prep was extremely minimal.

All this week I spent laying out the design and position of the dog holes for the deadman.  I got to use my favorite power tool, the bandsaw, for the design and then moved to the drill press for all the holes.
I used a forstner bit for the holes and set my depth stop to only allow the point of the forstner bit to penetrate the back of the deadman.   I then came back and finished up from the back side.  Both the drilling and clean up of the design were much more difficult than I expected.
The growth ring are very tight and, while I don't know why, this particular piece was harder to pare with my just sharpened chisel than the Osage Orange.  Here is what I came up with after a coat of oil has been applied.


This week, I'll get started on either the gap/stop and/or the dogs.

Sunday, February 5, 2012

Get Woodworking Week Is Here. Get To It!!

Tom Iovino, a prolific blogger for Tom's Workbench came up with
The idea is for those of us that are doing woodworking to encourage newcomers to dig in and and give it a shot. 

Woodworking for me is about designing.  It's a creative outlet.  I started helping out a friend who was a general contractor years ago.  All that time with power tools made me comfortable with them.  Taking my time with cutting, and lots of it, greatly improved my hand to eye coordination.  

Almost 15 years ago, my wife Sylvia and I bought a very modest 1910 Craftsman Four Square house.  The house had all the original trim and it was in great condition, except for nearly a century of paint on the woodwork.  It was all very basic and unadorned.  

I had the idea of woodworking in my head prior to this, but bringing that house back to it's original beauty was what really fueled the fire and placed the desire squarely in my heart.  I bought a contractor tablesaw, a planer and a drum sander during that time, as well as assorted other small power tools.  

Although we loved the house and all it's character, it was downtown and not the greatest area.  I had bought five acres of land several years into that remodel and by about year number eight, we decided to finish up the last of it and move to the country.  The deal was that Sylvia would get a pool, I would get my dream woodworking shop and the dogs would have lots of room to run.  

Five years into building the shop and I still had not built anything of my design and not much of anything beyond regular trim work.  I had been pouring over all the woodworking magazines: American Woodworker and WOOD for years; Fine Woodworking and Woodwork magazine came in as I gained the basic knowledge the former magazines target toward the "beginner" woodworker.  I had watched David Marks on DIY Woodworks, discovered a young man named Marc Spagnuolo who was creating online content that was geared toward the woodworking community, and started seeing more and more online activity to follow.  

I was well on my way to being one of those guys whose real hobby is the shop, not building furniture.  I was comfortable.  Yes, I had big dreams to design and build, but I was building a shop, dammit, and it needed to be perfect before I started down that road.  The problem was, nothing is ever perfect and if you're going to do anything, at some point you have to actually start doing it! 

Queue a request from a life long friend, who had just found, after trying for quite some time that they had finally got pregnant and in my enthusiastic joy for them, the words coming from my mouth, "I'd love to build you something for the baby."   Oh my god!!  What was I thinking!?  The shop isn't done!  I'm not ready for this!  Take it back!  Quick, take it BACK!  After the initial shock of what I'd committed to subsided, I thought about it and, hey! I've read about it.  I've studied it for years.  I CAN DO THIS!!  That statement is key!  YOU can do this!!  It's not rocket science.  It's a series of steps toward an end product.  

The result of me finally doing, instead of planning to do has been a turning point in my life. I'm in the shop as much as humanly possible.  I've not only dreamed of a life of design and woodworking, I'm doing it and although there are times I still freak out over one process or another, I think it through and approach it with confidence.  Everyone can do what I'm doing, you just have to believe in yourself and GET WOODWORKING!!  

Enjoy your one shot at this life and make it everything you dream!!

Vic

Sunday, January 29, 2012

Leg Vise Complete - Part 10

At the close of the last post, I had just started in on the guide wheel brackets.  This week was all about finishing the last piece to the leg vise.  Because of what I wanted to do with the brackets, there needed to be a specific sequence to the process.  After cutting the slot for the wheels, I cut the curves for the wheels and a 1/4" slice off the front of the brackets.  I then cut the front profile.

After that, I adhered the off-cut back on and that allowed me to cut the side profiles.  Again, I repeated the "chevron" pattern.  Some time spent with my 2 inch chisel and some of my rasps and files and the brackets were cleaned up.


Next I tapped for the set screws for the wheel pins, installed the Orange Osage pins I'd made and put a slight bevel on the round.
When I went to tap for the bolts that hold the brackets to the legs, I spaced and used the wrong tap.  I went too big and messed up the holes.  Luckily, the world makes a product called PC Lumber that set up in about an hour and let me re-tap for the bolts.
From here is was a matter of assembling the vise and adjusting the glide for smooth movement.  After I'd achieved a fairly smooth action on the leg vise, I mounted the leg vise's screw bushing.  This fits the screw like a glove and keeps everything precisely tuned.  I used my router plane to inlay the bushing and it is purposefully not a tight fit to allow adjustment.  Sorry, but I didn't get any photos of this procedure.  I always have too much fun using the router.
Here are a few photographs of the completed leg vise.


I'm extremely excited to know that this week I'll finally be getting rid of the sawhorses I've been working on as a bench for the last couple years!

Sunday, January 22, 2012

Number 9, Number 9, Number 9...Everyone must build Roubo

If you've been paying attention and you know the bloggers I do, you know that for one reason or another workbenches are "it" right now.  Kari Hultman of the Village Carpenter has started her version of the Andres Roubo workbench.  Erik Gilling of Better Living Through Woodworking and Chris Adkins of High Rock Woodworking are just two off the top of my head that are building along with me and we're building along with The Woodwhisperer Guild, headed by yet another bench builder and entrepreneur, Marc Spagnuolo.  It seems everyone is taking slightly different approaches to the bench, but the one thing they all have in common is they are the Roubo workbench that Chris Schwarz popularized in the woodworking community with his books on workbenches.  Be sure to check out their blogs, you can even view Marc's progress on his woodworking blog that is housed on his free site The Woodwhisperer.

This last week I finally got back into the shop.  I'm now in the process of building the parts and assembling the Benchcrafted leg vise.  The first step was after I finished fitting the glide to the roughed out chop, was to figure out the location of the of the hole for the vise's screw and the mortise for the guide rail.  I just clamped everything in place, leaving about 1/16" on the top of the chop that I will flush after the complete install.

I transferred all the marks to the chop and drilled for the screw.


For the glide mortise, I started by using my Triton router with an edge guide to make  the initial slots on either side of the leg.  I drilled the waste between the two slots with my drill press and cleaned everything up with my chisels.


After checking alignment, I drilled the hole through the leg for the screw and laid out the design on the chop, which is a continuation of the design used for the glide.  The design is based on the chevron design found in the art deco style.  You can barely see it laid in this picture of the chop.
The wheel and screw are actually fastened to the chop with machine screws and required tapping.  Luckily, my Grandpa had given me his tap and die set.  It was nice to finally be able to use it.
I mounted the hand wheel and tested the clearance of the glide in the glide mortise.  After that, I cut out the design for the chop and cleaned it up with my chisels.  My chisel of choice is my 2".  It's probably the most used blade in my shop.  The weight and size make it very easy to yield for many operations.  

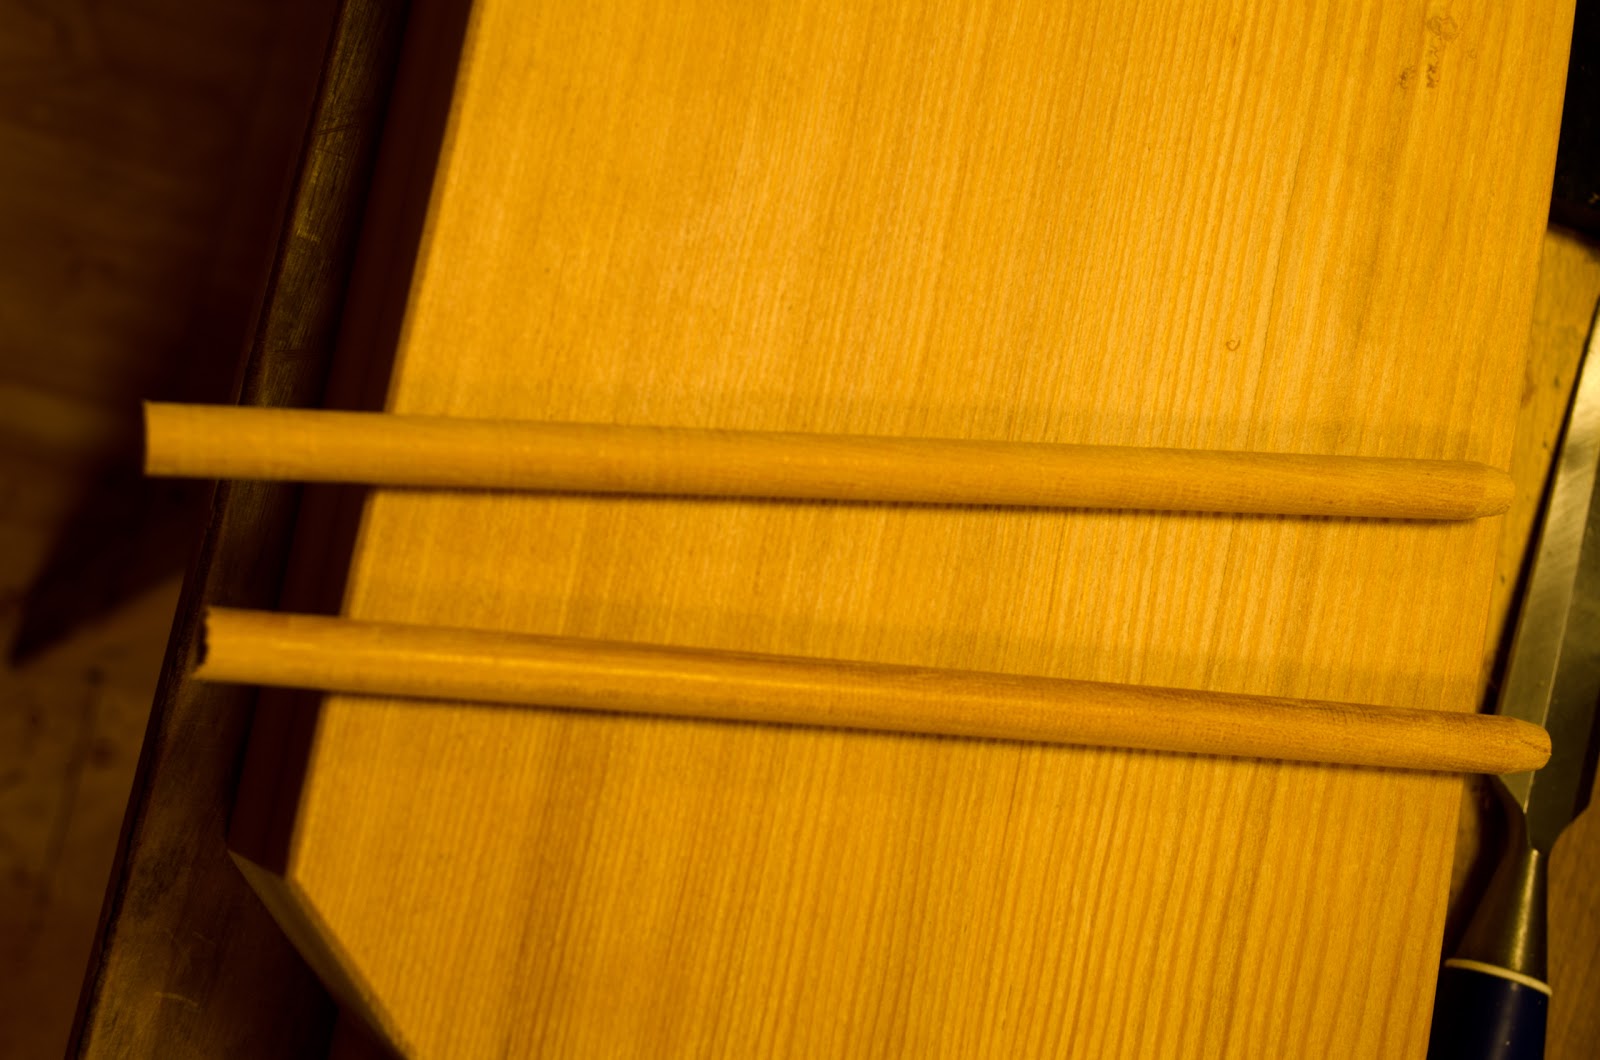
I made some 3/8" dowels on my Woodrat from the Osage Orange, drilled the holes to pin the glide and drove the dowels home.  Since Orange Osage is so hard, it should do well as a pin for this purpose.

Late last night I posed the question to my social media friends, should I inlay this nut or not?  Was there any reason I should other than that seems to be the thing to do. The overwhelming response was to do the inlay, but no particular reasons why it may be better to do so, in terms of integrity.  I decided to go ahead and do the inlay, thinking that besides being slightly better looking, it would put less stress on the machine threads that are only holding in Fir, which is considered a softwood.  Today, Marc Spagnuolo saw that I had decided to do the inlay and concurred on the possibility of this being slightly better in terms of strength.
The operation was again at the drill press using my large diameter forstner bit to hog the majority of the waste from the recess.  I cleaned the perimeter with a chisel and got to the final depth and a clean bottom with my router plane.  Here is the nut after the inlay process.  
This morning while I drank my coffee, I decided to do some detail work on the chop and glide.  The glide "stub" sits proud and rather than cutting it off flush to the surface, I decided to facet it, as well as cleaning up the final edges of the chop.  This is a detail I later found will need to be changed.


The last thing I did today was start to rough out the glide wheel brackets.  Once I get these done, I can finally glue up the base and set the tops on!

I'm pretty close to wrapping this project.  I still have dogs to make and the lower shelf.

Wednesday, January 11, 2012

TWW Roubo Build - Part 8: Builder's Block

I'd like to say I just haven't had any time in the shop this week, but the truth is I hit a wall.  Earlier this week I milled the stock for my leg vise, deadman and parallel glide.  All was going extremely well.  I had routed the groove that the deadman needs in the bottom of the top of the bench.  As you can see, I even had a knot explode on me.
No problem.  These things happen.  It wasn't catastrophic, just an annoyance.  No one is ever going to look under the bench and I believe the leg will cover the transgression.  I proceeded to figure out the design I wanted to incorporate into the leg vise and the parallel glide.  I cut the design out on the bandsaw for the parallel glide, cleaned everything up with my chisels
 and then proceeded to layout and drill the holes that are used to keep the leg vise from racking.  CATASTROPHE!!!
  I had horrible tear out.  Luckily, I have many friends on Twitter and other social media sites and I ran the situation by them.  Some felt I should just be OK with it and move forward.  "It's just a bench!".  My buddy Chris Wong of Flair Woodworks and Time Warp Tools thought I could simply do another, thicker glide and plane off the offending tear out.  My Hand Tool School teacher, Shannon Rogers, explained the forces that the glide encounters doing it's job and suggested that maybe Fir was a bit too soft to handle the situation.  My first reaction was to follow Chris' suggestion to go thicker and stay with the Fir.  A little background might help here.  I'm a bit obsessive compulsive in certain things of my life.  I really wanted to build the entire bench out of Fir.  If I was to introduce a contrasting wood, I would have done the end cap of the wagon vise in that wood.  I envisioned me sawing apart the end cap from the bench, which is now glued in place, simply to appease a compulsion that would gnaw at me endlessly until I succumbed to the somewhat psychotic demand.  Ultimately, I am choosing to move forward with the glide being made from some Osage Orange I have on hand, which over time will fade, but is fairly close in color to the old growth Fir I've used on the rest of the bench.
While I had the part dimensioned and the mortise fit, I laid out the cuts I need to make on the leg.  
I will wait to do those until I have the new part, just in case the dimensions change a bit.  Only time will tell if I have to start tearing things apart to make them either match or properly contrast.  YES, I'm weird, but I'm OK with that.

Monday, January 2, 2012

The Woodwhisper Guild Roubo Build-Part 7

It seems some parts of this build go quite fast and others, not so much.  The fitting of the tenons is something you really want to sneak up on.  So, I tend to cut everything a little fat, then pare, test, pare, test, pare.  Except for the haunch for the long stretcher that was cut deep enough to accommodate the extruded "V" shape that the deadman runs on, all the joinery was originally cut using my Excalibur for the tablesaw.  That particular cut was going to take me outside of my comfort zone on the tablesaw and the litmus test on anything you do on power tools should be, "if it doesn't seem safe, DON'T DO IT!"  There are many ways to accomplish the same thing. In this case, I got to use my Doc Holliday saw from Bad Axe Toolworks.


In this first shot, you can see I used a flip-stop to enable repeatable cuts and I drew a line on the fence to make it easier judge to where I needed to cut after the initial shoulder. 
           
This next shot is the view of the nibbling out of the waste.  Again, I didn't find the time savings of installing the dado blade to be worth it.  I'd rather cut the shoulders of the tenon with my Freud Fusion blade and so made a series of cuts, broke off the waste and pared with my 2 inch chisel. 

Although I don't want to fill the splits in the legs with epoxy, you can see here that it may prove inevitable.  When I go to glue the ends with the short stretchers, I will use the West System epoxy and make sure they are set to dry with the split upward.  I'll also use some blue tape to keep any epoxy from coming out of the split.  After the glue up, I'll reassess whether I need to fill the cracks.  Most of what I'll be concerned with is the aesthetics.  If I get too much epoxy visible in the crack, I will fill it completely.

Once all the short stretchers were cut and were a snug "slip fit", I did a dry fit and squared them up to enable me to take the measurements of the long stretchers directly from the piece.  
If you are a follower of Marc Spagnuolo's The Woodwhisperer, you'll be familiar with this process known as relative dimensioning.  

These two final shots are a couple views of the base dry fitted.  Although the entire project is built to be "knock down", it is quite the feat to both assemble and disassemble.  The mortise and tenon joints on the long stretchers will be mechanical held together with hardware that came in my Benchcrafted kit.  Therefore, these joints were slightly more loose than a "slip fit".  

After the first assembly, I checked for square and found I needed to slightly move the position of the tenons that let the top sit on the base by about 1/16 of an inch.  To do this, I had to get on the bench and lift each end out of the mortises and carefully slide each long stretcher from the legs, all the while trying to avoid letting anything crash to the floor.

After seeing the piece as a whole, it seemed to me to be beefy enough to not need a fifth leg.  Luckily, there is the The Sagulator.  I entered the dimensions of the bench with 200lbs of dead weight in the center.  Even with that, the bench should only deflect by .003" and the threshold on The Sagulator is .020", so I'm well within engineering tolerances.

Tuesday, December 27, 2011

A Beefy Base - TWW Roubo Build Part 6

Welcome back for the sixth installment of my build for The Woodwhisperer Guild Roubo bench build.  Upfront, I apologize for not capturing and subsequently glossing over some of this process. I'm still not great at remembering to always document.  I get caught up in the process and totally forget.

The first up was laying out the mortises for the top to land on to the base.  Again, the Sketch Up model that Aaron Marshall did for Guild was open and constantly referenced.  Using Aaron's model has convinced me that Sketch Up is a must for me to learn.  Any questions I've had during this build have been easy to answer by referencing the exploded views.  I am always tailoring some of the measurements due to my bench being both 10 feet long and only having a 3 inch laminate top.  

I had been planning on routing the mortises, but wasn't really looking forward to it because of all the dust it would be creating.  More on dust later.  Through discussion on Twitter and an earlier recommendation by Rob Bois of The Bois Shop (A VERY excellent podcaster), I decided to buy the Triton 2 1/4 HP plunge router.  While, according to all the input, the Triton did not have the 5 star rating of the Festool routers, it did have really good dust collection and at a much lower price point.  Luckily, Milne Power Tools, which is conveniently right across the street from my office, carries the Triton brand.  When I got the router home, I made a few modifications with foam tape to help the dust collection to be a bit more effective and set up what I like to call my white trash boom arm.  
This allowed me to route without dealing with the weight of the vacuum hose, which I fed over the top of the only interior wall and suspended with a rope.  If I had only had some baling wire!
Once the mortises were cut, I set up the Excalibur sliding table with the miter fence and cut the legs to length and also cut the tenons.  
I'm essentially a lazy person, so I just nibbled the material away rather than deal with changing out my everyday blade with the dado set. It really didn't take up any time and the cheeks cleaned up quickly with my 2 inch chisel.
  
I spent quite a while perfecting the fit of the legs to the top, but I'm finding more and more I actually love hand work.  I can lose all track of time while I'm playing with a sharp blade on wood.  The size of these tenons was a real joy to work with the 2 inch chisel.  The angle is set rather shallow to be a really great paring blade.

Once I was happy with the fit of the legs to the top, I stopped and milled all the stretcher parts.  This is a process that I forgot to document.  I still use, and sure I always will, power tools for any of the processes that would be labor intensive with hand tools.
Since I plan to first assemble the ends, I made sure the legs were dead square and marked the shoulders of the tenons.  I then laid out the mortise on the legs that will house the stretchers.  Again, I extensively used Aaron's Sketch Up model.  
The next part, which I know some are interested in, was again missed in photo documentation.  The Woodrat, a machine that I really love, is also a machine I really hate. I have not come up with a good solution for dust collection while using it.  I couldn't cut the tenons with the Triton because they were too deep for the Triton plunge capacity.  The Woodrat really excels at rather quickly cutting mortises, although I don't have mine set up to easily handle this size of timber.  You can get a pretty good overview of what the Woodrat is capable of on the Woodrat Site.  I don't remember the name of the guy, but before he died, he reviewed tools and showed how to use them in great detail.  He always had some young lady helping him out.  If you remember his name, please post it in the comments.

Tonight I finished up the mortises and will start the stretchers tomorrow.  If there are any processes you have a question about or frankly advise on a better way to do a process, please let me know in the comments.

Thanks again for following the build!