Showing posts with label The Woodwhisperer. Show all posts

Sunday, January 22, 2012

Number 9, Number 9, Number 9...Everyone must build Roubo

If you've been paying attention and you know the bloggers I do, you know that for one reason or another workbenches are "it" right now.  Kari Hultman of the Village Carpenter has started her version of the Andres Roubo workbench.  Erik Gilling of Better Living Through Woodworking and Chris Adkins of High Rock Woodworking are just two off the top of my head that are building along with me and we're building along with The Woodwhisperer Guild, headed by yet another bench builder and entrepreneur, Marc Spagnuolo.  It seems everyone is taking slightly different approaches to the bench, but the one thing they all have in common is they are the Roubo workbench that Chris Schwarz popularized in the woodworking community with his books on workbenches.  Be sure to check out their blogs, you can even view Marc's progress on his woodworking blog that is housed on his free site The Woodwhisperer.

This last week I finally got back into the shop.  I'm now in the process of building the parts and assembling the Benchcrafted leg vise.  The first step was after I finished fitting the glide to the roughed out chop, was to figure out the location of the of the hole for the vise's screw and the mortise for the guide rail.  I just clamped everything in place, leaving about 1/16" on the top of the chop that I will flush after the complete install.

I transferred all the marks to the chop and drilled for the screw.


For the glide mortise, I started by using my Triton router with an edge guide to make  the initial slots on either side of the leg.  I drilled the waste between the two slots with my drill press and cleaned everything up with my chisels.


After checking alignment, I drilled the hole through the leg for the screw and laid out the design on the chop, which is a continuation of the design used for the glide.  The design is based on the chevron design found in the art deco style.  You can barely see it laid in this picture of the chop.
The wheel and screw are actually fastened to the chop with machine screws and required tapping.  Luckily, my Grandpa had given me his tap and die set.  It was nice to finally be able to use it.
I mounted the hand wheel and tested the clearance of the glide in the glide mortise.  After that, I cut out the design for the chop and cleaned it up with my chisels.  My chisel of choice is my 2".  It's probably the most used blade in my shop.  The weight and size make it very easy to yield for many operations.  
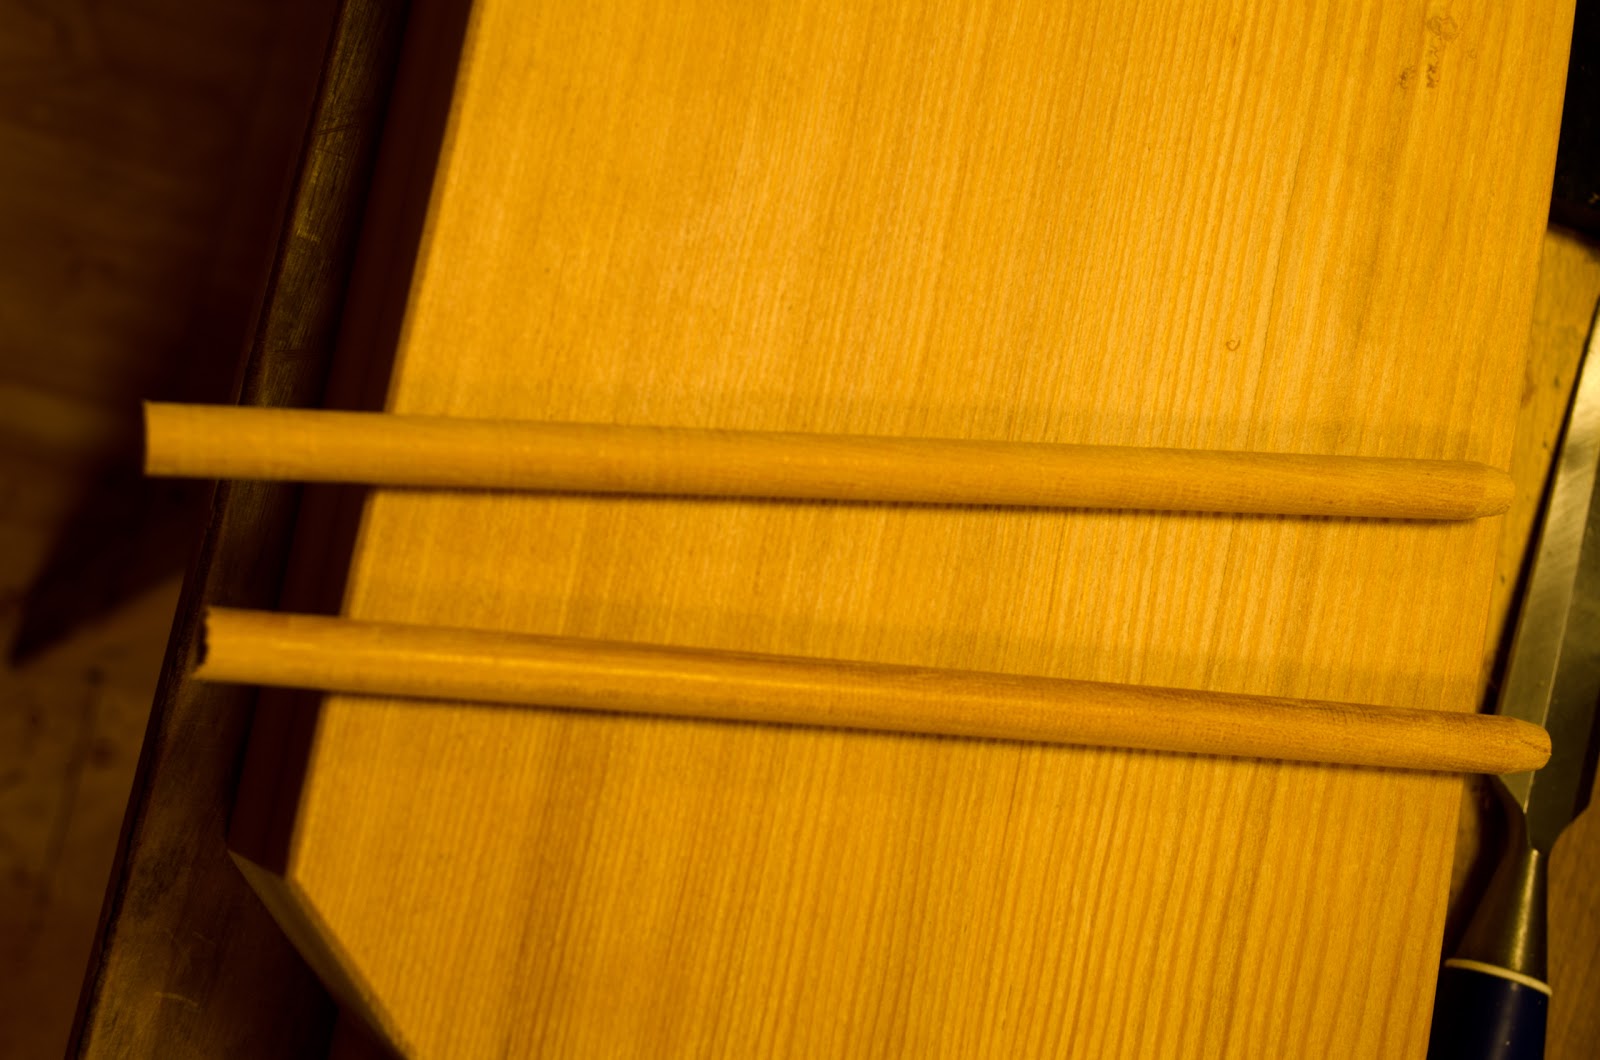
I made some 3/8" dowels on my Woodrat from the Osage Orange, drilled the holes to pin the glide and drove the dowels home.  Since Orange Osage is so hard, it should do well as a pin for this purpose.

Late last night I posed the question to my social media friends, should I inlay this nut or not?  Was there any reason I should other than that seems to be the thing to do. The overwhelming response was to do the inlay, but no particular reasons why it may be better to do so, in terms of integrity.  I decided to go ahead and do the inlay, thinking that besides being slightly better looking, it would put less stress on the machine threads that are only holding in Fir, which is considered a softwood.  Today, Marc Spagnuolo saw that I had decided to do the inlay and concurred on the possibility of this being slightly better in terms of strength.
The operation was again at the drill press using my large diameter forstner bit to hog the majority of the waste from the recess.  I cleaned the perimeter with a chisel and got to the final depth and a clean bottom with my router plane.  Here is the nut after the inlay process.  
This morning while I drank my coffee, I decided to do some detail work on the chop and glide.  The glide "stub" sits proud and rather than cutting it off flush to the surface, I decided to facet it, as well as cleaning up the final edges of the chop.  This is a detail I later found will need to be changed.


The last thing I did today was start to rough out the glide wheel brackets.  Once I get these done, I can finally glue up the base and set the tops on!

I'm pretty close to wrapping this project.  I still have dogs to make and the lower shelf.

Sunday, December 18, 2011

Whew! Part Five - TWW Guild Roubo Build


This was easily the most intimidating part of TheWoodwhisperer Guild build for me.  I've only cut one dovetail up to this point by hand.   It did not go well.  This time I'm cutting blind dovetails and from reading the BenchCrafted instructions, you either get the fit of this vise correct, or it doesn't work well.  What good is a premium vise if it doesn't work like it should?

So, I laid out my dovetails and put my little Doc Holliday to work.  I tried to employ what Shannon Rogers has taught us at the Hand Tool School and did my best to "split the line".  I don't know if it was because I was cutting horizontally, the learning curve, or I'm just a spaz, but I managed to drift on each dovetail when cutting the right side.  Both were straight and true on the left where I could actually see the line, but the right sides both drifted to the left as I approached the bottom of the tails.

After cutting out the dovetails, I needed to "straighten" them and pare the waste.  I got to use my Knew Concepts fret saw.  I think next time I can get closer to the base, but even though I was probably being overly cautious, it was fun getting there.


Right off the bat, I found I needed to fire up the sharpening station.  My chisels and, as I found, my planes all needed drastic attention.  I had too shallow an angle on my chisels and was damaging the edge trying to chop out the waste.  The station proved to work very well.  Since I still haven't been pleased creating the initial angle on my Delta variable speed grinder, I used the DMT Duo Sharp in the bottom drawer, moved up to the wet stones, then finished on the sandpaper on glass.  Considering I was completely reshaping the blades, I was surprised how little time it took to get them from rough to a polished finish.  Because I tend to be a space cadet, I made sure to write the settings I used on for the Veritas Mark II honing guide.

Once I had the tails cleaned up, I created a 1/4" rebate on the bottom of the tails to register against the end cap and transferred the tails to the end cap. 


After rigging up a clamping solution, which I will NEVER have to do again once this bench is built, I again pulled out my Bad Axe dovetail saw and got to work.  It all seemed to go well, but as you can see in the second photo, I was over zealous in marking my lines.  After using the knife to mark, I wanted to define the line a bit better with my chisel and I think I pushed too hard and "moved" the line.

After chiseling out the waste and doing a dry fit, you can see my joint had almost as big of a gap as my front teeth.
With much finessing and dry fitting, Saturday night I glued everything up and called it a day.  I did, however, return to the shop about an hour later to clean up my glue mess.  I'm still not very good at applying just the right amount.


Luckily after clamping up and paring down the end cap, it wasn't nearly as bad as I'd originally suspected.  I've thought about using glue and sawdust to help hide the mistake, but I think this is a good lesson to remember.  The second and bottom is much better than the top and, as time goes on and I keep practicing, I WILL get better.
Now came the fitting of the vise.  Because I went with a bench top thickness of 3", the Benchcrafted directions said to use 3/4" thick spacers to properly position the tail vise runners.  That ended up being too thick and made the hardware bind too much to travel as freely as the video shows.  After trying a couple pieces of 3/4" plywood, which is actually 23/32", I thought momentarily about just using it.
Considering the reclaimed aspect of this build, I decided not to introduce man made wood.  It turned out that was a good decision in terms of the vise, too.  I ended up with a even slightly less thickness and the vise's action was incredible.  So, if you are building along or using a Benchcrafted tail vise on a future bench.  Test it out and play with the thickness.

The last thing that was kind of freaking me out was the drilling and final set of the runners.  In the previous post when I'd drilled for the retaining bolts, I had not though about the placement of the runners  I think I dodge that bullet by a hair, which you can see in this photo.


I think the hardest part is over.  I already have the legs, dead man and tail vise parts milled.  I need to mill the rails still and then on to the base construction!!!

Thursday, February 25, 2010

Woodworkers Fighting Cancer - Shaker Table Build


I thought this would be a good time to start blogging again. Marc Spagnuolo of The Woodwhisperer recently challenged all of his TWW Guild members to join in a community build to raise money for cancer. Marc himself is donating $5 for every member that completes this month's build and he has also got several companies on board. In the short time that he has had a donation button on his podcast sight, he has raised over $1670 in cash.
While I was not really ready to start building anything and still getting the shop "just so", I thought this was a good reason to get off the pot, as it were. So, this will be my actual first piece of "fine" (hopefully) furniture. It's gonna be great that so many are building along. If I, or any of my fellow guild members get stuck, we all have each other for support. It is really a great community Marc and his wife Nicole have built.
About a month ago I picked up several pieces of very nice lumber at Jensen's Hardwoods in Walla Walla, WA. This is the piece I'm going to use for the build. I'm heading to Portland, OR mid-March and will pick up some mahogany for accents.
Wish me luck!! I certainly hope I don't just end up butchering this beautiful piece of cherry!!